-
Help with front HCV - Tra...
Forum: Help, I need help ASAP
Last Post: HoosierDaddy
1 hour ago
» Replies: 1
» Views: 21 -
AI powered coach info
Forum: General
Last Post: pairodice
Today, 08:34 AM
» Replies: 0
» Views: 37 -
Front Aquahot hose leaks
Forum: Heating Systems
Last Post: whited44
Today, 05:57 AM
» Replies: 43
» Views: 6,096 -
HWH Slide fluid reservoir
Forum: Slides
Last Post: Poweron
Yesterday, 04:49 PM
» Replies: 2
» Views: 81 -
Leaking cylinder
Forum: Suspension/Tires/Wheels
Last Post: Poweron
Yesterday, 02:07 PM
» Replies: 2
» Views: 100 -
2027 Little Valley (No) R...
Forum: Get Togethers
Last Post: [email protected]
10-08-2026, 01:48 PM
» Replies: 10
» Views: 597 -
Best approach for getting...
Forum: Newell History
Last Post: Jack Houpe
10-08-2026, 03:04 AM
» Replies: 4
» Views: 164 -
New to Newell and DDECII
Forum: Engine and Transmission Monitoring Systems
Last Post: Norton1090
10-06-2026, 08:14 AM
» Replies: 4
» Views: 207 -
Air Brake Chambers
Forum: Air Operated Systems and Leaks
Last Post: Jack Houpe
10-06-2026, 07:20 AM
» Replies: 5
» Views: 218 -
Our first RV, coach 210
Forum: Please introduce yourself
Last Post: Jack Houpe
10-06-2026, 02:49 AM
» Replies: 5
» Views: 218
- Forum posts:70,790
- Forum threads:8,453
- Members:4,466
- Latest member:[email protected]

03-09-2019, 01:05 PM
Forum: Coaches for Sale (Please read the info in the Category description)
- Replies (1)

Sitting here in North Carolina reviewing the past years travels. Everything from a scary boil over on Baker Grade on the west side of Las Vegas in the Summer, ( it is amazing how fast you go from a manageable engine temp to oh-oh) , to an easy pull up through east bound 70 to Denver and 11,000 ft altitude, engine temp holding at 185 F, with the ambient air being i 30 F. After the Baker Grade overheat, I put 1000 miles on the coach and sent oil samples to Blackstone. Everything came back great.
I understand the the 8V92 was never designed to be cooled in the manner that the Classics do,with the radiator being cooled with hot air being pushed out of the engine compartment through the radiator. I never took a reading, but even with hi temp wraps on the exhaust system, I am assuming that the temp of the air cooling the radiator is well over ambient air temp.
Have any Gurus every toyed with the idea of forcing air in the vents on the side of the coach, via a fan similar to a fan used on newer coaches? Would this assist the radiator fan, or just send air in one side of the engine compartment and out the other?
We never replaced the inverter/charger as we got it to work just fine for the last year or so.
We bought 6 new AGM 8D batteries (since we don’t boondock much) when the engine work was being done.
I’m at Tom’s place in Wittman and we noticed the batteries were slowly dying after sitting for a while. I had the batteries merged while sitting still (like normal). The ‘charge’ button was pushed on the Heart Freedom 25 Combi inverter panel. The battery bank went down to about 11volts (I didn’t take pictures of the panel so cannot remember the exact voltage or amps).
I finally built a mount (sort of) like Tom’s for the inverter and it came out pretty well - now the inverter stays on the wall and doesn’t move around (will test this on I-10 soon!).
The inverter seems to switch fine and powers the microwave even with low house batteries.
The engine batteries are currently being charged with a very nice (Thanks Tom!) battery charger today and I will switch to the house batteries to charge them later today.
The PROBLEM is the charger in the inverter does not look like it is working as we have consistently lost volts/amps in both battery banks since the banks were merged.
I was/am getting both an E-10 and E-13 error “I found a loose but on the coach battery side and after tightening it I get an E-13 error which the manual says “battery voltage sense leads open”battery voltage sense leads open and a reference to “violet wire on inverter remote panel”. I pulled the panel off but was unsure how to test the wire.
I have done a ‘hard reset’ - disconnected all the batteries, unplugged the shore power, waited 30 minutes and reconnected batteries (first!) then plugged in the shore power and nothing changed.
I’m starting to think the F2 (charger) fuse may be blown inside and found some instructions (just now) on how to check that using the power wires to check continuity.
I checked all the battery fuses I could find and got continuity across them (once Tom showed me how to use my meter correctly! - I learn then I forget again). I left the wires attached to the fuses and probably need to do this test again especially with the fuse nearest the inverter (that will be fun).
I think the nearest Xantrex service center is in CA :-( They will probably tell me I need a new inverter, which I probably do need...
Found this on Govplanet looks like blowers for an 8V92.....
https://www.govplanet.com/for-sale/Parts...pnLink=yes
i have my coach tarped for the winter..besides the exhausts on the roof is there another one for the furnace ? I might want to spend a night in it during cold weather just want to make sure its safe as long as the roof exhausts is free and clear ?

Is there a Facebook page?
03-05-2019, 10:04 PM
Forum: Coaches for Sale (Please read the info in the Category description)
- No Replies
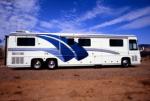
Quad slide with marble and wood tile flooring throughout. Just completed. Mid entry.
https://www.newellcoach.com/default.asp?...wInventory
![[Image: A683C2A1-7AFC-4314-9DDE-1D1DEBB2F978.jpg]](https://cdn.dealerspike.com/imglib/v1/1024x768/imglib/Assets/Inventory/A6/83/A683C2A1-7AFC-4314-9DDE-1D1DEBB2F978.jpg)
![[Image: A59E0EA7-97BA-46E6-9C2E-C6207E83F8E9.jpg]](https://cdn.dealerspike.com/imglib/v1/1024x768/imglib/Assets/Inventory/A5/9E/A59E0EA7-97BA-46E6-9C2E-C6207E83F8E9.jpg)
![[Image: 31E307F8-6267-47EA-90CC-B3C2A0B039A7.jpg]](https://cdn.dealerspike.com/imglib/v1/1024x768/imglib/Assets/Inventory/31/E3/31E307F8-6267-47EA-90CC-B3C2A0B039A7.jpg)
![[Image: EEB6485C-6069-4468-8D5C-CF9793C7AA37.jpg]](https://cdn.dealerspike.com/imglib/v1/1024x768/imglib/Assets/Inventory/EE/B6/EEB6485C-6069-4468-8D5C-CF9793C7AA37.jpg)
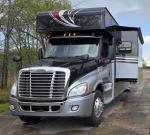
i got stuck out back of my shop over the weekend. we did get it out with a lot of digging and a piece of plywood.
i used my differential lock for the first time that i remember.
then once out, the diff lock indicator light over the drivers head indicator panel would not go off.
there is a lighted rocker switch on the center console, then the diff lock indicator overhead.
went back and forth etc but it did not go off. the lighted rocker switch would go on and off.
evidently the way it works is the lighted rocker switch energizes an air solenoid valve that is directly below the rear six pack in the drivers side engine bay. turning the rocker switch on and off would put air to the diff and turning the switch off would release air pressure on the valve.
there are 3 terminals on the panel in front of the passenger seat. one that said diff lock, two that said diff lock indicator.
diff lock one went on and off with the switch and the valve accordingly went on and off
so with newell friends watching the drive wheels i did a sharp left hand turn in my crushed granite and then a hard right hand turn and the feeling was the diff lock was off.
but light was still on. so we put it in the shop, jacked up the rear drivers side drive axle and the tire spun freely while the other side was fixed. so it was off
now the indicator light went off. evidently it is tied to some sensor somethere and you have to drive forward a bit to get it to go off
tom

https://www.rvt.com/Newell-Triple-Slide-...2-UX111223
Just curious if anyone has any intimate knowledge of this particular coach? Engine? Steerable tag? Previous owners? Issues?
thanks!
![[Image: Mark-Martins-airplane-hanger.jpg]](https://cdn.racingnews.co/wp-content/uploads/2018/01/Mark-Martins-airplane-hanger.jpg)