-
AI powered coach info
Forum: General
Last Post: pairodice
1 hour ago
» Replies: 0
» Views: 9 -
Front Aquahot hose leaks
Forum: Heating Systems
Last Post: whited44
4 hours ago
» Replies: 43
» Views: 6,068 -
HWH Slide fluid reservoir
Forum: Slides
Last Post: Poweron
Yesterday, 04:49 PM
» Replies: 2
» Views: 61 -
Leaking cylinder
Forum: Suspension/Tires/Wheels
Last Post: Poweron
Yesterday, 02:07 PM
» Replies: 2
» Views: 89 -
2027 Little Valley (No) R...
Forum: Get Togethers
Last Post: [email protected]
10-08-2026, 01:48 PM
» Replies: 10
» Views: 592 -
Best approach for getting...
Forum: Newell History
Last Post: Jack Houpe
10-08-2026, 03:04 AM
» Replies: 4
» Views: 153 -
New to Newell and DDECII
Forum: Engine and Transmission Monitoring Systems
Last Post: Norton1090
10-06-2026, 08:14 AM
» Replies: 4
» Views: 200 -
Air Brake Chambers
Forum: Air Operated Systems and Leaks
Last Post: Jack Houpe
10-06-2026, 07:20 AM
» Replies: 5
» Views: 205 -
Our first RV, coach 210
Forum: Please introduce yourself
Last Post: Jack Houpe
10-06-2026, 02:49 AM
» Replies: 5
» Views: 202 -
Power tech generator
Forum: Generators
Last Post: PMCBR
10-05-2026, 06:11 PM
» Replies: 2
» Views: 152
- Forum posts:70,789
- Forum threads:8,453
- Members:4,465
- Latest member:[email protected]
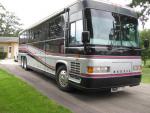
Getting a lot of heating from sun in windshield! Does anyone have experience with tinting or shading anywhere on windshield?
We want to be legal, but not cook when the sun is in our faces!
Thanks!
Danny

Thursday, I fueled at Love's Baytown. Cash price was $2.85, TSD price was $2.43. Saved $0.42 per gallon. After the TSD fee, my price was $2.47 per gallon or $0.38 per gallon which is a savings of $38 per 100 gallon purchase.
My grass farm friend purchases road diesel 3000+ gallons at a time for $2.48 a gallon. This is serious savings.
At the pump
Insert card and enter PIN number
Select Tractor
Skip DEF (select if you need DEF)
Skip Cash Advance
Skip additional products
FUEL and Leave
Friday morning I received an email detailing the transaction, more info than I wanted to know. This included the amount to be debited from my bank and the date of the debit.
NO going inside to authorize and NO going inside to get a receipt. EASY What is not to like.
I have found a new Diesel Fleet Fuel Discount Program . The TSD Logistics company provides an EFS fleet fuel card now to Motorhome owners. This is the card large trucking companies give to their drivers.
The discount on diesel fuel at Loves Truck Stops is 40 cents plus. TA/Petro provides a discount of 30 cents plus and Pilot is only about 5 cents plus. TSD earns a fee for processing the transaction of 10% of the discount. Even with the 4 cent fee at Loves in my area, diesel is less than my farm friend pays for 3000 to 5000 gallons bulk purchase. This is an excellent discount that will save you money. There is no annual fee or cost beyond the 10% of the discount. The discount is only at the mentioned truck stops at truck pumps.
AND the discount is calculated from posted cash price – not credit price. So, if you have been paying credit price, this is 5 to 10 cents more savings.
I am providing a link below after the program description to click to access the application forms. It is all online and secure. Very easy to submit.
THE PROGRAM
The program will require you to fill out a form authorizing Automated Clearing House Transactions (ACH Debit) and a EFS Fuel Card form with your information. There are terms and conditions you should read to understand your participation in the program.
There is no annual fee. TSD Logistics collects its fees by retaining 10% of the fuel savings.
You will be provided with a complete listing of TSD Logistics fuel prices based on state and city for Love’s, TA/Petro and Pilot / Flying J.
Your participation in the program is limited to only diesel fuel, DEF, and propane. Discounts only apply to diesel fuel purchased at truck islands.
The way the fuel discount program works is TSD Logistics will issue you a card. At the pump you will swipe the card and you will enter needed security information. When the pump is activated, pump your fuel, hang up the nozzle and drive away. At the end of the day or the following day you will receive an email summary of the transaction. The funds will automatically be deducted from the account you provided.
This program will provide deep discounts at Love’s locations and while there are no penalties for low volume purchases please understand each transaction has a cost to TSD. We would encourage users of the program to act responsibly by using the program for large fuel purchases so we remain in good standing with the program provider.
In the event you need to communicate at any time with team at the fuel desk at TSD Logistics you may call or email the following:
Fuel Desk: 1-800-275-5089
Tara Rape
Direct: 903-831-8944
Cell: 903-748-6896
Email: [email protected]
Gina Leeper
Direct: 903-831-8941
Email: [email protected]
Courtney Mosley
Direct: 903-831-8906
Email: [email protected]
THE LINK
https://www.tsdlogistics.com/fuel-card-application-rv

08-01-2019, 03:07 PM
Forum: Coach Related Service, Repair or Maintainence
- Replies (6)
I'm trying to find a repair facility that can do some work. Air bags, suspension, Lube & Oil... etc. I stopped by the "preferred" repair facility that Newell shows on there website here in Fresno where I work and they never heard of Newell (go figure)... Let me know of any good shops that you used them when you were in the area.
08-01-2019, 01:43 PM
Forum: Coaches for Sale (Please read the info in the Category description)
- No Replies
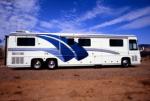
Quad slides, front entry, C-15 625 HP, ZF 10 speed transmission.
https://www.rvtrader.com/listing/2007-Ne...5008584216
![[Image: 5d2ddda577f6d622b92e4897.jpg?width=1024&...quality=70]](https://cdn1.rvtrader.com/v1/media/5d2ddda577f6d622b92e4897.jpg?width=1024&height=768&quality=70)
![[Image: 5d2dddf8e357541c6f44dcb7.jpg?width=1024&...quality=70]](https://cdn1.rvtrader.com/v1/media/5d2dddf8e357541c6f44dcb7.jpg?width=1024&height=768&quality=70)
![[Image: 5d2dde16fde05151f825f174.jpg?width=1024&...quality=70]](https://cdn1.rvtrader.com/v1/media/5d2dde16fde05151f825f174.jpg?width=1024&height=768&quality=70)

Excess battery rack for six 8D batteries. Removed from 2000 model, refurbished in 2014. Good shape, slides work as do locks.
[attachment=7032]
PM me here or email. Email address : [email protected]
Located in Ohio. Will ship truck. Asking $250
Our older #277 has a Dometic DN1070 ice maker that began leaking under the cabinets. The cause of the water leak was an over heated plastic water line.
The reason for this post and other owners to watch is the condition of the ice maker coils. This unit pulls in air on the left side of the grill and the hot air exhausts on the right side.
The problem was the coils were COMPLETELY clogged!! They didn't appear to have been cleaned since the coach was built in 1991. There was no filter and you have to lay on the floor to be able to see the coils after you remove the small grill.
After removing unit, cleaning of the fins and a new water line, it works well.
Even if you don't have this particular unit, ensure your ice maker's coils are cleaned or filtered!
Good luck and miles,
Danny

Just saw a nice silver Newell heading down the Sterling highway in Alaska south of Soldotna. Anyone from the forum?

After running the A/C on our 96 overnight, I noticed three large puddles beneath the middle of the coach. I looked under as best I could and it appeared water was dripping from the undercoating. It seemed strange that it would be designed that way. I thought there would be tubes or pipes to gain separation from the undercarriage.
All,
Took coach to Newell in late October 2018 because of air leaks. A technician spent 8 hours chasing air leaks. At the end of the day the technician showed me the fittings that were replaced and the areas of the coach that they came from. Also, on this trip one of the auxiliary air compressors was replaced. It had over two thousand hours.
Last Tuesday I went out to the coach and paid attention to the frequency that the air compressor came on and how long it ran. I called and talked with the service department and they made some recommendations.
Last Tuesday the air compressor had 200 hours and today it had 213.5 hours. A bottle of soapy water sprayed on the air compressor bay fittings revealed no leaks. I took a stop watch with me and timed how often the compressor was on and how long it ran. The compressor would come on every five minutes and thirty seconds and run for thirty seconds. I got the same reading several times. I then switched to the other auxiliary air compressor and got the same readings.
Any suggestions? Input welcome. Got an appointment to take the coach to Newell in September.
Reese Cantrell
Newell Coach 1242