-
AI powered coach info
Forum: General
Last Post: pairodice
4 hours ago
» Replies: 0
» Views: 24 -
Front Aquahot hose leaks
Forum: Heating Systems
Last Post: whited44
6 hours ago
» Replies: 43
» Views: 6,073 -
HWH Slide fluid reservoir
Forum: Slides
Last Post: Poweron
Yesterday, 04:49 PM
» Replies: 2
» Views: 61 -
Leaking cylinder
Forum: Suspension/Tires/Wheels
Last Post: Poweron
Yesterday, 02:07 PM
» Replies: 2
» Views: 92 -
2027 Little Valley (No) R...
Forum: Get Togethers
Last Post: [email protected]
10-08-2026, 01:48 PM
» Replies: 10
» Views: 593 -
Best approach for getting...
Forum: Newell History
Last Post: Jack Houpe
10-08-2026, 03:04 AM
» Replies: 4
» Views: 154 -
New to Newell and DDECII
Forum: Engine and Transmission Monitoring Systems
Last Post: Norton1090
10-06-2026, 08:14 AM
» Replies: 4
» Views: 202 -
Air Brake Chambers
Forum: Air Operated Systems and Leaks
Last Post: Jack Houpe
10-06-2026, 07:20 AM
» Replies: 5
» Views: 206 -
Our first RV, coach 210
Forum: Please introduce yourself
Last Post: Jack Houpe
10-06-2026, 02:49 AM
» Replies: 5
» Views: 206 -
Power tech generator
Forum: Generators
Last Post: PMCBR
10-05-2026, 06:11 PM
» Replies: 2
» Views: 155
- Forum posts:70,789
- Forum threads:8,453
- Members:4,466
- Latest member:[email protected]

So the other day I went to move my 1992 bus and of course the batteries were toast. Kids switched off the merge switch. Charged them overnight and was able to get it started and moved for a friends car show. At first i thought maybe the brakes were locked up. Did the back and forth deal and was able to move. The funny thing was that when in neutral everything would rev up fine, turbo engage etc. Once in drive or reverse bus would only run 3 mph max. I got it parked and decided to work on it another time. I purchased new batteries, fired the bus up and now it will not move it all. It changes gears just fine, just doesnt move??? Dumb thought though, I disconnected the safety alarm switch, does this have some type of override??? ANy help would be greatly appreciated.
Signed,
Matt

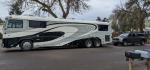
What a great forum! I am new here but have already been browsing the forum on and off. You folks are a tremendous wealth of knowledge!
A few years ago, I nearly bought a 1992 Newell... the economy crashed shortly after, so in retrospect, the extra payment was something I did not need. But I have thought of that experience quite often. The test drive I took with it was most impressive. I was used to driving my 1989 35' Rockwood gasser, and the contrast between driving experiences was night and day. I had never even heard of Newell before that test drive, but never forgot how smooth and quiet the ride was, and how well it tracked and handled.
Fast forward a dozen years... I am working on an early retirement (I'm 49) and once I get my ducks in a row, I will be looking at a Newell again. An older coach, possibly around the 100k range. I'm really grateful to have found this group, and looking forward to learning more about the Newells and maybe hearing from you folks about anything that I should look for or avoid as I begin my Newell shopping.
Thanks!
Steve
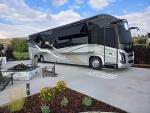
I found the original order form and the plans for Coach #1240
I left Oklahoma with the hydraulic fluid reservoir 1/2 way between add and full. Somewhere in the 3 day trip to Spearfish SD I developed a steering gear box leak which I found when parking at Elkhorn RV resort. I had lost 1/2 gallon of fluid which meant I was right on the add line. I tried to find a mobile mechanic but this was a big job the steering gear box is 130 lbs and requires serious air tools to remove. The mobile mechanic I found said he had done the repair on an 18 wheeler. I ordered the seal kit which was for a Sheppard M110P1 gear box. The mobile mechanic as a no show for 2 days with what seemed like legit excuses. However, I needed to get fixed and leave, and there was no commitment when he could arrive. After calling repair shops nobody would install the seal kit - too much liability. Thus, I opted for a reman unit shipped to the repair facility. I chose Floyd’s Trucks a Freightliner facility. The reman unit was due to arrive Wednesday. I made the tough decision not to try to drive 50 miles to repair facility, but opted to be towed. The unit was leaking sporadically. Towing was covered by FMCA roadside assistance. I tried to schedule 4 days In advance but that was not possible. I had a recommended towing company, Plains Towing, from the repair facility. Thus, I called FMCA about noon on the day I wanted to be towed and told them about the preferred towing company which I had already talked to and determined that they should be qualified. The towing company turned out to be amazing, another post. The repair facility, Floyd’s Trucks Freightliner, struggled the first day to remove the pitman arm. They decided to have a local machine shop modify their tool the morning of the second day which worked well removing the pitman arm. They got the new unit installed just before end of day, and we headed back from Rapid City SD to Spearfish SD. I had indications that the steering radius was limited on the way back but figured it out when I could not make the turn into the RV park. Research overnight led me to believe they did not adjust the poppet valves correctly even though they said they adjusted them. I talked with gurus and the rebuilder, then showed up first thing in the morning at their shop. Apparently the tech was not familiar with manual adjustments and thought that all were auto adjustments. We worked from 8-11am to set them per specs which gave me better turning radius than before! Back on the road the coach has no slack In the steering anymore, and is surprisingly quieter. While painful and expensive, this was an upgrade I should have done in the past as I am finally pleased with the coach handling, a one handed operation even in SD heavy cross winds.
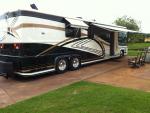
I have a Kenmore stacked washer/dryer. Dryer drum would turn, but not heat.
Part of why we want a Newell is for the fit & finish, but removal is a little challenging because of how tightly it is fit. There is a piece that holds the top of the dryer that is held in place by three screws that are removed from the top. That piece could now be moved up and out of the way. A second piece halfway down is held in with two screws on each side--remove it. The last piece that needs to be removed fits in between the washer & flooring and is held in with three screws--remove it.
Tip: There is a 1 1/2 space between the stainless steel washer pan and the flooring where that last piece that held the unit in was removed. Fill the space with wood so the washer feet don't get stuck in the gap.
Now remove both bottom washer doors. Remove the doors by unscrewing the hinges from the mount. By removing the doors & hinges together you will give yourself an extra 1/8" that you will appreciate upon removal & installation. Then I removed the top door & hinge on the front of coach side. This door has to be removed to be able to move the unit forward in the coach to give yourself room to repair.
Now we need to unhook the unit from water, drain, dryer vent & electric plug. FIRST SHUT OFF THE WATER PUMP AND CLOSE BOTH WATER BAY VALVES TO THE WASHER. All connections are accessed by removing two screws that hold on the sheet metal panel that runs on a 45 between the washer & dryer. Unplug. Unscrew dryer vent hose clamp and compress the metal vent hose back toward exterior wall--leave hooked up to exhaust port. Now remove drain hose from the "T". Lastly remove the washer supply hoses from back of washer--cold on top, hot on bottom.
Now it is time to remove the unit from the cabinet. This is when the fit and finish will no longer be your friend. You will only have about 1/8" on each side at most. Hinge washer door up in the open position. Now grab the washer tub and start moving the unit out by moving it side to side as you pull forward. Oh yea, now you have to lift the front of unit as you move it out so the washer legs clear the edge of the stainless steel washer pan. Keep working it out and as you do you will have the w/d case to help you. You will have to lift the back of the unit so the rear legs clear the lip of the ss washer pan. Now you have the appliance out of its cabinet and you have no room in front an I get it by the refrigerator door handles. Continued using a side to side movement as I moved it toward the front of the coach & into the kitchen. No more room as you move in the hallway than you had in the unit's cabinet. Once in the kitchen I got the unit to where I could get behind it. I am now about 2 hours into the job.
Not knowing why the dryer would not heat I removed the rear panel's approx 8 screws. The dryer has a fuse and I tested it for continuity. There was none. Fuse, not an automotive type, was bad, but I didn't know why. I decided to change the heating element at the same time. I was able to order both from Amazon.
Fuse: 3399849 Dryer Thermal Fuse Replacement For Inglis,Admiral,Kenmore,Whirlpool
https://www.amazon.com/gp/product/B079PL...UTF8&psc=1
Heating element: [/url][url=https://www.amazon.com/gp/product/B07CS9MVL1/ref=ppx_yo_dt_b_asin_title_o02_s01?ie=UTF8&psc=1]Whirlpool, Kenmore WP279843 Heating Element 279843 AP6007492, PS11740608[/urlze][/color]
https://www.amazon.com/gp/product/B07CS9...UTF8&psc=1
Replacing the fuse was simply removing one screw and two wires. Replacing the heating element required removing two screws that held on a thermostat, removing the two supply wires and two screws that held the unit in. Replacement of each was just reversing removal steps. Replace rear panel of unit. About 30 minutes with a little cleaning.
I cleaned up the empty appliance cabinet and boy did that stainless steel pan polish up nice...........................................Just kidding! 
Now you are ready to move the unit back into its cabinet. Just as tight as it was upon removal. I had to line up the unit with the cabinet and began moving side to side slightly as I moved it back. I had to get a pry tool and piece of wood to raise the rear of unit as I moved it back to clear the ss pan lip. Continued moving it back. Now I could stand in front, raise the front of unit with my pry tool & my foot so I could get the front legs to clear the ss pan lip. Once in the pan the unit slid back into place. Remove the wood you used to fill the gap between the flooring and the waoring and the washer pan. Hook up the washer hoses, drain hose, dryer vent and plug dryer in to outlet. TURN THE WASHER WATER VALVES IN WATER BAY BACK ON & CHECK FOR LEAKS! Replace three boards that hold unit in. Replace the sheet metal cover that runs on a 45 between the dryer & washer. Reinstall the three doors. Lastly I took the Wash & Wax All to clean up the blood I left on the unit & cabinet. About 2 hours for the re installation.
Suzy is back in business & has a smile again! 
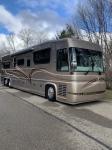
Valid Slide Service Manual in PDF. Great manual with information that everyone needs.
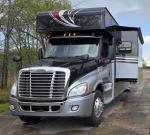
we are living in our newell for 6 months in the same place. the water is hard. i researched rv water softeners and you can spend alot of bucks on them.
here is what i ended up buying. i have bought 3 home water softeners from them and have been very happy with them.
179 bucks shipped. works great. i just fill the tank with it and then put it in the bay. something it doesnt say to do in the instructions, but be sure to flush it before you use it the first time or you will have rusty colored water from the residue in the tank the first few uses. i now flush it for a few seconds before i hook it up each time
https://www.affordablewater.us/RV-Portab...P1315.aspx
tom
![[Image: GetImage.ashx?Path=%7e%2fAssets%2fProduc...xWidth=300]](https://www.affordablewater.us/GetImage.ashx?Path=%7e%2fAssets%2fProductImages%2fRV_Soft.jpg&maintainAspectRatio=true&maxHeight=300&maxWidth=300)

I have read through all of the posts about the pressure bleed off valve on the water separator. On 643 it's different, the valve is attached on the bottom of a 3 port tee manifold next to the water separator and the pressure switch is mounted on top of that manifold. I don't see a check valve anywhere. Can anyone with a coach around 2003 that has that setup send me a picture. Mine looks like someone modified it so I want make sure it is connected correctly.
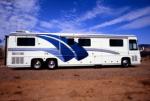
06-27-2019, 05:57 PM
Forum: Coaches for Sale (Please read the info in the Category description)
- Replies (3)
Just completed, quad slide, front entry, all porcelain tile flooring, bunk beds (top bunk folds converting area into a closet), 2 FULL BATHS.
https://www.newellcoach.com/default.asp?...wInventory
![[Image: 0A0A8CF3-5A0B-47ED-9A7E-9EDEC6EAFDF6.jpg]](https://cdn.dealerspike.com/imglib/v1/1024x768/imglib/Assets/Inventory/0A/0A/0A0A8CF3-5A0B-47ED-9A7E-9EDEC6EAFDF6.jpg)
![[Image: 03E7E804-6DFA-4ACD-8A82-9F3A0FF9564A.jpg]](https://cdn.dealerspike.com/imglib/v1/1024x768/imglib/Assets/Inventory/03/E7/03E7E804-6DFA-4ACD-8A82-9F3A0FF9564A.jpg)
![[Image: 9131DAD4-BB01-4B70-9A4A-D13AF7B4E989.jpg]](https://cdn.dealerspike.com/imglib/v1/1024x768/imglib/Assets/Inventory/91/31/9131DAD4-BB01-4B70-9A4A-D13AF7B4E989.jpg)
![[Image: 664FA56D-27D6-4A38-90BA-2E81251390D8.jpg]](https://cdn.dealerspike.com/imglib/v1/1024x768/imglib/Assets/Inventory/66/4F/664FA56D-27D6-4A38-90BA-2E81251390D8.jpg)
![[Image: DE6E6E98-149A-44B7-A998-A31449121EC1.jpg]](https://cdn.dealerspike.com/imglib/v1/1024x768/imglib/Assets/Inventory/DE/6E/DE6E6E98-149A-44B7-A998-A31449121EC1.jpg)
![[Image: C9D8903B-73FB-4619-A305-78217D885CE6.jpg]](https://cdn.dealerspike.com/imglib/v1/1024x768/imglib/Assets/Inventory/C9/D8/C9D8903B-73FB-4619-A305-78217D885CE6.jpg)
06-27-2019, 01:10 PM
Forum: Coaches for Sale (Please read the info in the Category description)
- Replies (1)
1996 Newell #410, VIN: 1n9450x8xt1011410 ONLY $89,900.
45’ Non-slide Chassis: 12.7L, 470 hp, Series 60, DDEC-3 ADS 33000 Truck Edition Performance Module (3-stage) Allison HD4060 - Filters and Synthetic Mobil oil (<3 years) Michelin 11R24.5 ZXEnergy, Steer 08/2018, Drive duals Tag 2016 Start Batteries 2 of 8D with PowerPulse Battery Savers 275 gal Diesel fuel tank, fill both sides Full air bag (10) suspension HWH Air Leveling 10,000# hitch with 7 blade RV connection Hydraulic engine cooling fan Side radiator and charge air cooler
Electrical Power: 20KW Kohler Diesel Generator (Kuboda 4 cylinder) House batteries 6 of 8D Absorbed Glass Mat (AGM) by Apex 03/2016 with 6 of PowerPulse Battery Savers 2 of Magna True Sine Wave 3000 watt inverters (6000 watts total) 50 Amp service cord with wind reel Chassis Repairs/Upgrades within the last 5 years: Detroit 60 Series Valve adjustment and Jake Brake Adjust at 165,000 Anti-Sway Bar Steering box replaced Air bags, all positions replaced (<1 year) Front Disc brake pads replaced, rotors turned, calipers serviced, seals replaced, DS wheel bearing replaced Rear Drum brakes checked and adjusted Alternator replaced (<3 years) GT2PB50E CRS Coolant Reservoir replaced with aluminum fabricated tank (Original CRS leaks after 2-4 years) Charge air cooler replaced Radiator removed, repaired and replaced Hydraulic supply line replaced Hydraulic fan motor hoses replaced Exhaust blanket replaced
High flow “Aero” muffler installed AEF high flow, washable air cleaner DS Windshield wiper bearing assembly replaced (<1 year) Operating Equipment: Basement Air: 1 single, 1 double (1 A/C Compressor replaced, <2 year) ducted Roof Air added over walk in closet AquaHot Mod. 431XE/12 - Completely remanufactured 2018 by John Carrillo HeatMyRV Hydronic heater living room (under couch) replaced (26,000 BTU original to 56, 000 BTU) Side by Side refrigerator - All electric, bottom drawer freezer with ice maker (5 years old) Kenmore stackable, full size washer and dryer Flat screen TV living room (5 years) Winegard Razor Auto Tuning TV antenna Winegard In-Motion Satellite Antenna (DirecTV) Wilson Trucker Cellular External antenna with power amplifier and internal antenna Sirius radio receiver Console radio, CD, FM, Aux in. Sound throughout coach 100 gal fresh water tank (replaced 5 years) 100 gal black/grey tank 2 of 12 VDC water pumps Electric, local/remote air operated holding tank dump City Water intake filter 2 of auto exhaust fans (ducted) Living Equipment: Living Room Area Leather couch with fold down double bed Round leather chair Recliner leader chair Fold out solid surface table Solid wood floors (LR) LR A/C - Heat Thermostat Solid surface desk with chair, drawers and file Hydronic heat (under couch) Kitchen Area: Marble flooring Double sink Solid surface counter with multiple drawers and storage Residential Side by Side Refrigerator with drawer freezer and ice maker 4 of slide pantry cabinets Stackable, full size washer and dryer Electrical, water, lighting control panel
Hydronic heat (under sink cabinet) Air pocket door between Kitchen and Bathroom area Bathroom Area: Marble flooring Air operated, porcelain toilet Storage cabinets above toilet Shower with circulating water tub Solid surface counter with china sink Full mirror over BR sink Large storage cabinet with 4 drawers below Hydronic heat under sink cabinet Air pocket door between bathroom and bedroom Bedroom Area: Carpet flooring Key-hole, queen bed Flat screen TV Lighted dresser mirror Storage under bed Safe under bed Solid surface end tables with drawer Ceiling fan Hydronic heat under bed Air pocket door between bedroom and walk in closet Walk in Closet: Carpet flooring Multiple drawers Triple hanging clothes rods Independent hydronic heat 15,000 BTU A/C, heat pump (roof).
For more information, visit www.motorhomefinders.com