-
New to Newell and DDECII
Forum: Engine and Transmission Monitoring Systems
Last Post: Norton1090
8 hours ago
» Replies: 4
» Views: 70 -
Air Brake Chambers
Forum: Air Operated Systems and Leaks
Last Post: Jack Houpe
9 hours ago
» Replies: 5
» Views: 70 -
Our first RV, coach 210
Forum: Please introduce yourself
Last Post: Jack Houpe
Today, 02:49 AM
» Replies: 5
» Views: 72 -
Power tech generator
Forum: Generators
Last Post: PMCBR
Yesterday, 06:11 PM
» Replies: 2
» Views: 57 -
Reverse lights not workin...
Forum: Electrical
Last Post: Richard
Yesterday, 02:24 PM
» Replies: 6
» Views: 174 -
Tag Axle Bushing Replacem...
Forum: Suspension/Tires/Wheels
Last Post: [email protected]
Yesterday, 10:15 AM
» Replies: 3
» Views: 96 -
Front Aquahot hose leaks
Forum: Heating Systems
Last Post: [email protected]
Yesterday, 10:14 AM
» Replies: 41
» Views: 5,778 -
New to me 2005 Newell 47 ...
Forum: Please introduce yourself
Last Post: superboop
Yesterday, 08:16 AM
» Replies: 9
» Views: 369 -
Driver steer blow out.
Forum: Slides
Last Post: Jesse
09-30-2026, 01:03 PM
» Replies: 15
» Views: 687 -
1244 for sale
Forum: Coaches for Sale (Please read the info in the Category description)
Last Post: Sea Note
09-29-2026, 08:21 AM
» Replies: 0
» Views: 194
- Forum posts:70,773
- Forum threads:8,449
- Members:4,459
- Latest member:bigrigfixer
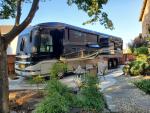
Hey all, I'm not all handy when it comes to solar stuff and I'm not sure there is a solar for dummies book. Where I live there is no power in my storage lot other than a 110v that I can use to keep a charger on my start batteries.
I'd like to ensure my house batteries are maintained. I have six 8d can anyone advise a simple solar setup that I can use the is mobile. I'd love to roof mount them but I'm just not sure how long I'll own the ole girl.
Any advice would be appreciated.
Thanks gurus


E-Z Steer quit today. Newell says they can reset the software which may or may not be the cure. Apparently it is a TRW Steering column with an E-Z Steer motor in it. They said parts are not available and that the entire steering column would have to be replaced.
Does anyone have reference materiel, repair info or anything that may help troubleshoot or repair it? TRW phone number? Is it possible that it is the ZF ReAx steering? https://www.trwaftermarket.com/us/produc...-software/
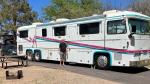
Should I dump my tag air before leveling? Seems like the rear won’t lower when in leveling mode because the tag bag stays pressurized.
Trying to locate a manual for my 1986 40’ #121. 8V92 with a 4 speed. Not sure what model Allison it has.

In hopes of not being the first to attempt. Has anyone added apple car play to the big display in the dash. I believe, because I have Garmin there is any open HDMI port which I should be able to plug into and then select that as a source. The google is somewhat overwhelming when trying to find the right hardware to order.
If I turn out to be the test dummy I will report back with success or failure.
JD
I am helping a friend that is in a sticky situation. I am mechanically inclined, but not a mechanic. I'm hoping someone can guide me.
This is a 96, with no slides. When I first worked on this coach almost 2 years ago, I couldn't get the rear end to lift up enough to safely drive around. It did once or twice and I had to manually lift it on the HWH pad. No Other issues with the air system.
Now, I have brake pressure. I hear it release at 120lbs. But I have no air supply pressure and I can't get the bus to lift up. I don't hear any leaks. I tried letting the bus run for an hour as well as trying shop air. I'll include a few pictures of current ride height and the gauge that I'm reading.
I don't know Newells. I'm begging for your help. Thank you.
06-19-2023, 09:16 PM
Forum: Discussion about what to consider on buying a used Newell
- Replies (9)
Hi all. We own coach 717, a 2005 that we have been full-timing in as remote workers for the last 3 years. We upgraded from a 36ft Country Couch to this on some great advice about drivability and of course 4 slides are amazing to live in. We are now thinking about buying an rv lot, so we would be off the road for 6 months and have access to a casita. We have come across a vintage 1987 coach that needs work but is really beautiful. (We also have a 1989 Land Rover Defender 110 that we sometimes tow - so we like cool, vintage things.). We liked having more freedom in the 36ft to boondock, go down dirt roads, more site availability, but I hated driving that thing in anything other than perfect conditions and then only for 4-5 hours.
I'm sure a late 1980's Newell with 8-10 air bags, 45000lbs and tag axle will drive much better than our 4 bag single rear axle CC but not as good as our 2005. I would also welcome a less complex setup, more similar to what we had on the CC. Since we would have 2 coaches for awhile, I'm prepared to invest in upgrades like victron inverter/charger/solar, lithium batteries, induction cooktop, residential fridge, maybe remove propane : basically a baby of the best of both of these coaches. I've done these upgrades twice now so know what to expect. What I don't know of are issues problematic to the older coaches (basement air?) and how it will drive and live long term. I have read the 1987 owners manual posted by Mxfram (thanks) so understand most of the systems. I can give up some space and comforts for 6 months (summer in the mtn west) given my ability to access more places and storage at our casita. I also willing to replace systems that could be problematic. The aquahot on my 2005 went out during covid and instead of wait months for a rebuilt unit $$$$$, I had newell install a new Oasis for less $$$$. However, I'm not going to be replacing diodes on a controller and probably cannot trace that kind of issue anyway, although I guess you learn your coach 1 problem at a time 
I will never forget the day I drove my 2005 home 890 miles, sometimes in 40 mph winds in NM. I would get out to stretch my legs and think, wow this is really windy. In my CC, I would be frazzled after 2 hours and need a sundowner way before sundown. I still want good driving but in a smaller (and cheaper) package. I hope this 1987 can give me the best of both worlds, but will take all advice.
Thanks in advance!
Mark

Hello all, my name is Jeff and I am looking at a Newell. I am a current Wanderlodge owner (with 6v92 Detroit) and have been looking for a Series 60 coach and I have always liked Newell. Most of the ones we are looking at are mid to late 90's era mainly because they have the Series 60 and price of course. Would love to hear any experiences or things to look for. I am fairly well versed in things mechanical, I do work on them and do all my own work. I have a pretty good idea of the things that a coach that is 25 years old needs, but do not know all the particulars of Newell.
If you are interested in my exploits working on Wanderlodges:
https://www.youtube.com/@GinosGarageUSA/featured
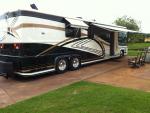
Here is a picture of our Wanderlodge
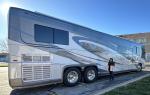
That's how I sum up my air conditioning repair skills....
I soldered in the condenser coil today and nitrogen pressure tested it. Held without issues for an hour. I vacuumed it down to 370 microns. it held and balanced at a max of 1400 after an hour. charged it with about 30 oz of R22 and temps seem right on. Can you fellow A/C gurus see anything wrong with what I have going on? Reason I ask is that the unit label shows a max charge of 22oz at 24' of line-set. I have about 26-28' and the amperage is holding around 20.1amps with it maxed at what is in the pic. (This is indoor and outdoor consumption) Temps are about 109º out. Discharge air is 44º
Rudy & Carol lost their Foretravel coach to a fire today. Rudy has been a true friend of the Gurus for many years. He is an AquaHot expert that has provided help to many Gurus.
Neither Rudy or Carol were physically hurt, but they lost everything in the coach.
Please keep them in your prayers!