-
2027 Little Valley (No) R...
Forum: Get Togethers
Last Post: [email protected]
Yesterday, 01:48 PM
» Replies: 10
» Views: 569 -
Best approach for getting...
Forum: Newell History
Last Post: Jack Houpe
Yesterday, 03:04 AM
» Replies: 4
» Views: 106 -
New to Newell and DDECII
Forum: Engine and Transmission Monitoring Systems
Last Post: Norton1090
10-06-2026, 08:14 AM
» Replies: 4
» Views: 177 -
Air Brake Chambers
Forum: Air Operated Systems and Leaks
Last Post: Jack Houpe
10-06-2026, 07:20 AM
» Replies: 5
» Views: 185 -
Our first RV, coach 210
Forum: Please introduce yourself
Last Post: Jack Houpe
10-06-2026, 02:49 AM
» Replies: 5
» Views: 165 -
Power tech generator
Forum: Generators
Last Post: PMCBR
10-05-2026, 06:11 PM
» Replies: 2
» Views: 139 -
Reverse lights not workin...
Forum: Electrical
Last Post: Richard
10-05-2026, 02:24 PM
» Replies: 6
» Views: 290 -
Tag Axle Bushing Replacem...
Forum: Suspension/Tires/Wheels
Last Post: [email protected]
10-05-2026, 10:15 AM
» Replies: 3
» Views: 167 -
Front Aquahot hose leaks
Forum: Heating Systems
Last Post: [email protected]
10-05-2026, 10:14 AM
» Replies: 41
» Views: 5,921 -
New to me 2005 Newell 47 ...
Forum: Please introduce yourself
Last Post: superboop
10-05-2026, 08:16 AM
» Replies: 9
» Views: 444
- Forum posts:70,780
- Forum threads:8,450
- Members:4,465
- Latest member:[email protected]
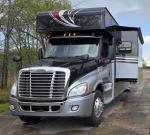
i am posting this for NEWELLbe, a new member. here is his request. if anyone can help please post.
thanks
tom
======================
July 1982 Coach # 1016
6V-92T/Allison
40' single drv axle
Wiring was beyond saving in engine area, and aux start panel.
We downloaded an owner's manual for 1987
With a bit of nomenclature regarding some functions and circuits.
Not quite enough to run with, but some colors are consistent.
My question would be
Are any charts, diagrams, or more comprehensive nomenclature available for coaches closer to our mfg date?
We have eng trans out for resealing, some cleanup and detailing in compartment, along with my wiring rescue mission.


This topic has been covered in other threads about air bags, but usually hidden in within threads.
On coaches with Ridewell rear suspensions, Goodyear air bags made in the last five years, maybe longer, have a known design feature that does not play well with the Ridewell suspension. It is at it’s worst with the tag air bag.
Let me describe the problem and then illustrate with pictures. If you look at the Ridewell suspension it pivots at one end, and the air bag is located at the other end, away from the pivot. The air bag is captured at both top and bottom. The top is bolted to the frame, and the bottom is bolted to the suspension. As you raise the coach above travel height and the suspension pivots, the two surfaces that the airbag is bolted to obviously move apart. They also do not maintain parallel alignment. On the tag in the fully up position, the two mounting plates are about 20 degrees out of parallel. On Goodyear air bags that is sometimes enough to cause the air bag to leak or burp. If it burps, the suspension will sit flat down with a big whoosh. If it just leaks, the suspension will slowly settle out of level. They may or they may not reseal themselves if you let the suspension all the way down. I have seen the leaking with my coach, I have seen the burping with Bill Johnsons coach where it sat completely down on one side in less than a minute, and I know that Mike Ginn’ s coach did this on the freeway putting the fender on the tires while moving.
First, the pictures of the Goodyear bags show how this is possible.
In this picture you see assembly of the bottom of the bag.
In this picture you see the support ring, which is not secured in any way, removed.
In this picture you also see the metal piston protruding from the bottom of the bag, you also see the bolt that secures the piston to the suspension.
In the last picture you see that the piston is simply sealed to the bellows of the bag by the piston fitting tightly into a reinforced bead molded into the rubber bellow. That is the root cause of the problem
When the piston is cocked in that reinforced ring (think tire bead), it breaks the seal. The piston cocks when the bottom and top plates are not in parallel.
Oh my, now that you have given me one more thing to worry about, is there a solution? Yes and No. Firestone air bags are constructed in such a way to prevent this from happening. Great, yes except two things. The bags we use for the drive axle are special order and take forever to get. Plus the bag we need for the tag is obsolete.
Just looking for some opinions and insights.
Most camp grounds have quiet times. They vary, but in general 9/10 pm to 7/8am. Sometimes i want to get an early start, but i am always concerned that i am going tick off the others. As you know, we don't have quietest engines, plus you got to give it time to air up, etc.
I'd like to know how the rest of you feel about this.
Thanks

02-07-2021, 08:16 AM
Forum: Coaches for Sale (Please read the info in the Category description)
- Replies (6)
Just saw this on MOT website. 2002 45' Mid Entry #630
79K miles, $119,000K. Only 1 picture but apparently more to com. Seems like a pretty good deal, at least on the surface
2002 Newell 45' Mid Entry | Motorhomes of Texas
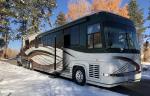
After reviewing the Interior threads, I must conclude that this is the first time my problem has occurred to anyone.
Whilst finally switching out the halogen for LED lamps in the main part of the salon ceiling, I discovered that the whole mirrored plexiglas oval panel is loose. It would have fallen by now except for hanging by the wires of its 8 lights. Through the 1" gap on one side, I see that the grey adhesive has simply let go. There's no evidence of a water leak or other damage.
Looking for an acceptable shortcut here. I'm hoping not to disassemble the whole ceiling, remove adhesive, reapply, shore it up to dry, re-install lighting, etc. Is this a job for adhesive/liquid nails, or is there a double-stick foam tape that's up to the job? Part of the challenge is that even the very center of this panel is loose, and that's almost three feet from the accessible edge.
I'm tempted to use fasteners with gold plastic caps, aesthetically arranged. Has anyone cracked the code? Thanks!

I am putting new Alcoa Wheels on with my 365 upgrade and want to update the front wheel covers. Does anyone know where Newell gets the the one in the attachment?
Thanks!
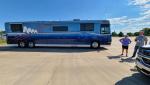
I have a 20kw Kohler generator head on a Yanmar engine. It has glow plugs.
It cranks fine in warmer weather but below 40 it takes several hits on the starter switch to turn over. It fires up right away once the starter cranks even down to 25 degrees so far. It seems like a weak starter.
However, it got me to thinking has anyone installed an engine block heater on their Yanmar? Even though I have glow plugs and they seem to be working I think being able to preheat the engine should reduce wear and tear. What are your thought
We plan to regularly use the Newell in cold weather, even with temps in single digits.
02-04-2021, 05:49 AM
Forum: Coaches for Sale (Please read the info in the Category description)
- Replies (2)
If you have Knorr Bremse disc brakes on your coach, you may want to put one of these into your tool box. The caliper pins are bolted in with a bolt that takes 14 mm hex to remove. If you are in TimBuk2 with a stuck caliper, you could in a pinch remove the caliper pins from the backside with this tool. You could clean them up, grease them, and put them back in without removing the wheel or the brake caliper. It’s not the proper way to do it, but it can be done.
Not ideal, but as another owner will tell you, a stuck caliper could result in a fire.
You will not find this tool at your local hardware, Lowe’s, or NAPA.
If you were really stuck, you could take a bolt with a 14 mm hex head, thread two jam nuts on it, and use that to remove the pins.
https://www.amazon.com/Sunex-26497-2-Inc...200&sr=8-5
https://www.amazon.com/Foambeak-Vertical...183&sr=8-2
For a number of years I have tried a dozen different techniques for reapplying the foam that is inside the wheel wells, and on the bottom of bay floors. Nothing I tried was efficient, worked with a flip, and didn’t result in most of the foam sticking to me. Until I stumbled in this little device.
The way I used it was that I inserted about 10 inches of tubing between the foam can nozzle and the beak. That way you can hold the can completely inverted, and maneuver the beak with ease. The way to use the beak is to hold it flat against the overhead or vertical surface and move it along at a moderated rated while holding straw in the triggered position. The foam will stick to the surface and then expand to about 1.5 inches thick. One can of the standard Lowe’s/HD foam will cover about 2 square ft.
You won’t really appreciate this gadget until you have tried to apply foam from a can onto a overhead surface.