-
HWH Slide fluid reservoir
Forum: Slides
Last Post: Richard
35 minutes ago
» Replies: 1
» Views: 32 -
Leaking cylinder
Forum: Suspension/Tires/Wheels
Last Post: Poweron
2 hours ago
» Replies: 2
» Views: 61 -
2027 Little Valley (No) R...
Forum: Get Togethers
Last Post: [email protected]
Yesterday, 01:48 PM
» Replies: 10
» Views: 582 -
Best approach for getting...
Forum: Newell History
Last Post: Jack Houpe
Yesterday, 03:04 AM
» Replies: 4
» Views: 116 -
New to Newell and DDECII
Forum: Engine and Transmission Monitoring Systems
Last Post: Norton1090
10-06-2026, 08:14 AM
» Replies: 4
» Views: 184 -
Air Brake Chambers
Forum: Air Operated Systems and Leaks
Last Post: Jack Houpe
10-06-2026, 07:20 AM
» Replies: 5
» Views: 195 -
Our first RV, coach 210
Forum: Please introduce yourself
Last Post: Jack Houpe
10-06-2026, 02:49 AM
» Replies: 5
» Views: 177 -
Power tech generator
Forum: Generators
Last Post: PMCBR
10-05-2026, 06:11 PM
» Replies: 2
» Views: 144 -
Reverse lights not workin...
Forum: Electrical
Last Post: Richard
10-05-2026, 02:24 PM
» Replies: 6
» Views: 311 -
Tag Axle Bushing Replacem...
Forum: Suspension/Tires/Wheels
Last Post: [email protected]
10-05-2026, 10:15 AM
» Replies: 3
» Views: 188
- Forum posts:70,785
- Forum threads:8,452
- Members:4,465
- Latest member:[email protected]
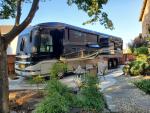
After a bunch of internet searching I finally found the Arcol mirrors from Spain that Newell installed as an upgrade on so many 05 and up units.
When I first saw the chrome ones on 751 I just knew I had to have them! My DW said "you don't need those mirrors" and you know what? She was correct I didn't need them, but I wanted them.
So after wiring some of my hard earned $$ to Spain we waited for six weeks for the big brown truck to arrive.
The mirror got here a little late but they arrived undamaged.
I bugged the crap out of Mike at newell to give me some advice on how to install them. After nervously drilling holes in the side of our new to us rig we got started.
I'm happy with the way they look but I want to reinforce them with some steel plates behind the fiberglass. Right now we just went thru the side cabinet. I think there is a small gap between the the fiberglass and cabinet, with some foam sprayed in the gap.
I want to cut out the wood, remove the foam and put some that steel plate flush behind the bracket that the mirrors hang on so that i don't take a chance on the fiberglass cap cracking while trying to support this 20lb mirror
![[Image: 20200629_073516.jpg]](https://s222.photobucket.com/user/hmdznrcld/media/05newell/20200629_073516.jpg.html)
![[Image: 20200628_193654.jpg]](https://s222.photobucket.com/user/hmdznrcld/media/05newell/20200628_193654.jpg.html)

I'm at the beach for afew days and the power panel went blank.no bars
The fridge is out also..with generator on all is good...I reset all the breakers and turned the battery switch off and on underneath
What's next
Thanks
Truman

HI all,
Need some help.
The Generator works for a while then shuts down- looks like a fuel or/and filter issue.
So first thing was to take off both fuel filters - the water separator filter with bowl- WIX 33211 and the smaller fuel filter WIX 33390.
There was no water or gunk in the separator but I replaced it anyway. When I took off the smaller filter (33390) I noticed that it was only half way full of diesel....replaced with new filter, both prefilled with diesel fuel, back on the genny, started right up and ran for a good hour...then quit again.
Went back to the small filter, took it off and sure enough it was only half way filled with diesel- filled it up, genny started after a couple tries and ran again for about an hour.....then it quit again....checked the small filter- half full of fuel again. The separator filter seems to be full and no water is visible or gunk in the bowl. If I refill the small filter, it runs fine for a while.
I checked all I could see, both filters are tight but for some reason I am losing the prime as it runs and it eventually quits.
Has anybody seen this happen ? What to look for ? What am I missing ? Do I have a questionable electric pump ?
BTW, the oil pressure sits at 45 and coolant temp around 190-200 F when it quits....so the shutdown is due to fuel. I have 3/4 full diesel in the tank and the engine runs fine.
Thanks for any suggestions.
in the covid19 lack of live sports......i started watching professional cornhole. my adult kids have started getting interested too.
so i had this custom cornhole set made up.
what else would i do but NewellGurus?
the streetsign is a copy of the real one in my backyard.
i will be playing it in the shop this weekend.
tom
When I turn out my headlights or travel lights on the voltage meter goes down and the temperature gauge on the generator goes up. Is there an electrical silinoid that could be bad or is it a ground problem? Any advice would help.
Thanks,
Jerry
07-01-2020, 08:18 AM
Forum: Coaches for Sale (Please read the info in the Category description)
- Replies (15)
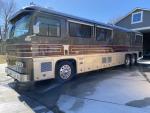
Looking if anyone is considering selling your classic Newell. You can send an personal message, email, or call me at 316-619-714seven
Thanks
John
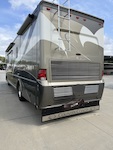
Found this video thought I'd pass it on....https://www.liveleak.com/view?t=ale1k_1593293438
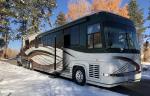
Good Morning! Planning a visit to the shop today to have airbag leak addressed. Engine no start. Last run was about 4 weeks ago, which isn't usually a problem. Plenty of fuel. After several cranks, I got a rough idle for a few seconds, then quit. Subsequent attempts won't fire.
Is there a priming process? Seems like all a big diesel needs in warm weather is fuel...
Detroit Series 60
Thanks!
Chuck
Good morning!
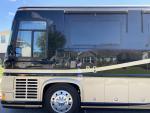
We are getting moved to Southern Illinois/St. Louis area and we just bought a house. It has a pole barn with a 12' door. My 1990 can fit, if the suspension is deflated. Is there a way to deflate the suspension and prevent it from airing up inside the barn? I know there's the Lower button on the HWH, but that isn't going to work right. Another solution would be to dump the air and hurry up and get out during the window of brakes working and airbags still down - but that sounds dangerous. I'm also considering a set of switches on the 6 pack to prevent the travel solenoids from activating. Any other less invasive ideas?
Secondly, I'll likely add some 50 amp receptacles on the side of the barn for guests - so that invitation will be open to all of you.
Last problem with the barn is that it is 30x40. I need to add another 10' section off the front to fit the whole coach. Any pole barn constructors in the area on this forum?
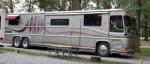
Trying to troubleshoot the dash air in our 1995 serial #373. It is going to need a new A/C compressor as it is locked up, which is well within my capabilities to change, vacuum draw down and service. But currently there is no power to the condenser cooling fans or 12v to the compressor clutch. The evaporator blower fan doesn't come on, in any fan speed position and there is no power at terminal #35 in the fuse area at the kick panel for the passenger. ( The only terminal I have found labeled dash air) Is there anyone with any knowledge of the wiring in my era for the dash air. There has to be some relay's for the higher current parts of the system and some associated fuse protection. I can't seem to find any of them and 45ft of coach is pretty hard to hunt and peck away with a voltmeter. So hints are helpful
Thanks!!