-
AI powered coach info
Forum: General
Last Post: pairodice
6 hours ago
» Replies: 0
» Views: 29 -
Front Aquahot hose leaks
Forum: Heating Systems
Last Post: whited44
9 hours ago
» Replies: 43
» Views: 6,080 -
HWH Slide fluid reservoir
Forum: Slides
Last Post: Poweron
Yesterday, 04:49 PM
» Replies: 2
» Views: 61 -
Leaking cylinder
Forum: Suspension/Tires/Wheels
Last Post: Poweron
Yesterday, 02:07 PM
» Replies: 2
» Views: 94 -
2027 Little Valley (No) R...
Forum: Get Togethers
Last Post: [email protected]
10-08-2026, 01:48 PM
» Replies: 10
» Views: 596 -
Best approach for getting...
Forum: Newell History
Last Post: Jack Houpe
10-08-2026, 03:04 AM
» Replies: 4
» Views: 159 -
New to Newell and DDECII
Forum: Engine and Transmission Monitoring Systems
Last Post: Norton1090
10-06-2026, 08:14 AM
» Replies: 4
» Views: 207 -
Air Brake Chambers
Forum: Air Operated Systems and Leaks
Last Post: Jack Houpe
10-06-2026, 07:20 AM
» Replies: 5
» Views: 212 -
Our first RV, coach 210
Forum: Please introduce yourself
Last Post: Jack Houpe
10-06-2026, 02:49 AM
» Replies: 5
» Views: 215 -
Power tech generator
Forum: Generators
Last Post: PMCBR
10-05-2026, 06:11 PM
» Replies: 2
» Views: 156
- Forum posts:70,788
- Forum threads:8,452
- Members:4,466
- Latest member:[email protected]
10-22-2017, 11:29 AM
Forum: Coaches for Sale (Please read the info in the Category description)
- Replies (3)
https://www.rvtrader.com/listing/2004-Ne...5000520220
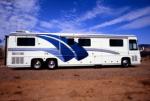
2004, bath and a half, quad slide, ZF suspension with steering tag.
![[Image: 59ea5055d5e6d13fe47d079e.jpg?width=1024&...quality=70]](https://cdn2.rvtrader.com/v1/media/59ea5055d5e6d13fe47d079e.jpg?width=1024&height=768&quality=70)
![[Image: 59ea678194e0a12efb2adafb.jpg?width=1024&...quality=70]](https://cdn1.rvtrader.com/v1/media/59ea678194e0a12efb2adafb.jpg?width=1024&height=768&quality=70)
![[Image: 59ea6a83a718fa62b122a5c5.jpg?width=1024&...quality=70]](https://cdn2.rvtrader.com/v1/media/59ea6a83a718fa62b122a5c5.jpg?width=1024&height=768&quality=70)


Here are the instructions that Newell provides for any one who needs to winterize their coach.
How to winterize your coach
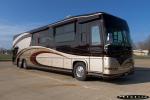
We are trying to decide on what type of surfaces for the sites.. this is not a money issue as much as a choice of what is best.. stamped stained concrete is an obvious choice. But there is a new product out there from a company called true grid, their product is permeable pavers . It is a plastic grating that is filled with the aggregate of your choice.. has been used in many parking lots for heavy trucks so I am not concerned about the ability to hold up to coaches. Another advantage is it drains almost instantly and reduces the need to control storm water run off. It is also super environmentally friendly. When installed it becomes like a very dense gravel pad.. what is everyone's opinion on this.

All of the credit goes to Julius @"Pardue101" for finding and specing this blower. This only applies to the nose mounted Kohler gensets as far as I know.
Grainger #1XJY4 is a drop in for the existing motor and belt driven blower. Be advised Newell welded a flange on the blower outlet to enable mounting to the coach. I simply cut the flange off the old one and welded it to the new one.
Make sure you order the 220V model.
The direct drive is much quieter than the original. I did not measure it with a dB meter, but Rhonda commented immediately. I decided to replace my original because the bearings were getting noisy again.
I don't know why anyone would want or need the old blower, but I'll keep it for a little while.
I do have a newish drive motor that I will put in storage, but you have to come here to pick it up, or I will bring to the next rally.

Today i serviced my Generator (1995 385)
I changed oil, filters and replaced the air filter.
I found the filters at a local truck parts store, they had (much to my surprise) the air filter.
IF you are looking for a replacement air filter, It's a Baldwin PA1690-FN

I am a first time Newell Owner and recently purchased a 2004 #696 coach which appeared to be in excellent condition (or what the previous owner deceptively lead me to believe from 1200 miles away). After bringing it home to Seattle we found that the coach had serious water damage requiring removal of the carpets and walls throughout the front and rear of the coach. Long story short, I have removed and replace all the plywood in the affected walls, new wallpaper, replaced the carpet, replaced the entire floor of the rear bathroom, new heat mat, new tile on floor and resealed all the affected windows.
Yesterday I reinstalled the two front seats in the coach and realized that I had forgot to mark the lower bolt hole that connects the seatbelt retractor mechanism to the wall. There must be a frame mounted bolt behind the new plywood wall, just behind the end of the wrap around instrument dash board, that I need to drill through the wallpaper and plywood board to bolt this retractor mechanism to.
Basically, I have 'painted myself in to a corner'. For those of you who have any model year coach around my year I would greatly appreciate if you could measure from the bottom of the overhead cabinet where the end of the curtain track, inverter and slide controls are mounted, down to the center point of where your lower seat belt retractor bolt is located. I fortunately did mark the upper bolt that measures 9 and 1/2 inches from the cabinet as a reference point. (It is not really a cabinet but I will call it that for lack of intelligence and being very frustrated). If you could confirm that the lower bolt hold is centered or not centered to the upper hole that would be helpful too.
I have attached pictures of this area for reference. I am hoping that I only must drill once to find this mysterious nut that is welded to the subframe of the wall that the seat belt retractor bolts to. We are just a week away from trying to get this coach to Indo California for the winter and hoping to get this problem behind me. Much appreciated for all those that can give me relative measurements based upon the location of your lower seat belt retractor.
P.S. This newellgurus web site has been really great for fixing other problems. My industrial sized air compressor in my shop was cycling every 45 minutes when I brought the coach home and now it comes on just once a day. The motorcoach air compressor could not keep up with the air leaks. Yes I bought a real lemon but now it is getting back to restored condition. I just need to stop painting myself in to corners.
Dallas
Well, we finally got our coach back with the new LVP floor installed. Overall, we're very happy with it, it looks great! On the critical side, the gap in the floor slide is slightly wider than we hoped, but not a deal breaker.
The other thing that seems a bit off, but I suspect is unrelated to the actual LVP installation is that the floor on each side of the crack has a little bit of give. So if you step right along the crack, the floor is effectively not level while stepping there. At first I thought it was just on the moving floor section, but it does seem to occur on the stationary floor section as well and mostly toward the rear end of the slide. Wondering if there is anything that can be done to shore that up from beneath. I haven't had a chance to pull all of our stuff out of the bay below to take a look.
I had a bad switch on my engine heater and the one I pulled out was a momentary switch, I didn’t have another momentary switch so I just used a regular on/off, question is how long do I let the heater run just saying the coach has set for a few days and it’s 25degrees outside ? Any input would be appreciated.
my number one slide had a seal go down. As I investigated it I realized this slide has 2 seals. One that runs on the bottom about 6-7 feet. And the other one runs the last 2 feet on the bottom up around the whole slide and the underneath another 2 feet. The one on the bottom side inflates the other one is where the leak is.. none of my other seals are doubles. Just this slide.. anyone have something similar? Why have 2 seals?