-
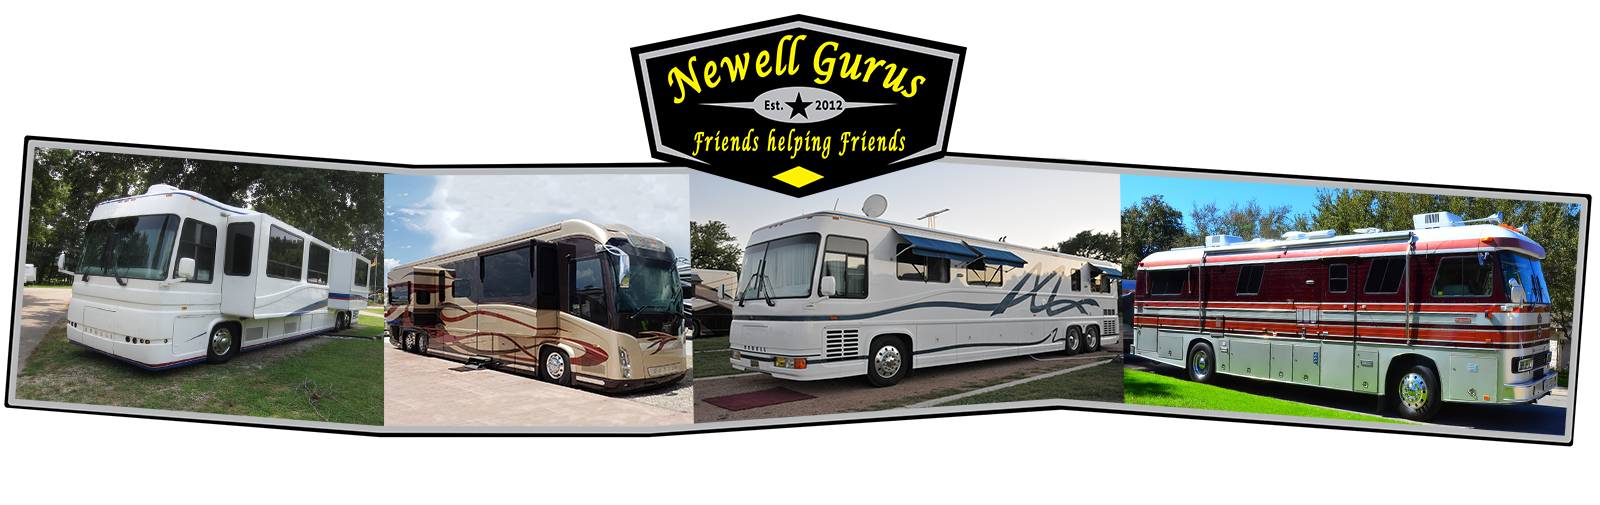
Our first RV, coach 210
Forum: Please introduce yourself
Last Post: Richard
1 hour ago
» Replies: 4
» Views: 49 -
Power tech generator
Forum: Help, I need help ASAP
Last Post: PMCBR
2 hours ago
» Replies: 2
» Views: 32 -
New to Newell and DDECII
Forum: Engine and Transmission Monitoring Systems
Last Post: whited44
3 hours ago
» Replies: 3
» Views: 45 -
Air Brake Chambers
Forum: Air Operated Systems and Leaks
Last Post: Richard
6 hours ago
» Replies: 2
» Views: 42 -
Reverse lights not workin...
Forum: Electrical
Last Post: Richard
6 hours ago
» Replies: 6
» Views: 137 -
Tag Axle Bushing Replacem...
Forum: Suspension/Tires/Wheels
Last Post: [email protected]
10 hours ago
» Replies: 3
» Views: 65 -
Front Aquahot hose leaks
Forum: Heating Systems
Last Post: [email protected]
10 hours ago
» Replies: 41
» Views: 5,740 -
New to me 2005 Newell 47 ...
Forum: Please introduce yourself
Last Post: superboop
Today, 08:16 AM
» Replies: 9
» Views: 327 -
Driver steer blow out.
Forum: Slides
Last Post: Jesse
09-30-2026, 01:03 PM
» Replies: 15
» Views: 670 -
1244 for sale
Forum: Coaches for Sale (Please read the info in the Category description)
Last Post: Sea Note
09-29-2026, 08:21 AM
» Replies: 0
» Views: 182
- Forum posts:70,767
- Forum threads:8,448
- Members:4,459
- Latest member:bigrigfixer

Good afternoon. It seems my wife has decided we needed a vintage Newell coach.
This is our new to us 1976. 2 previous owners 148k miles on it. It has been sitting since 2015.
A quick wash and it looks like most of the grime will clean up on the exterior.
Unfortunately it's going to be a complete gut job as there is a leak in the roof and the floor has some pretty substantial water damage.
I'm sure I am going to be looking for guidance all over the forums.

hi all,
for those of us with hwh hydraulic slides it is becoming very clear that the old guard at newell that understood and fixed them is fading quickly. that makes it even more important for us to help each other and document and post our fixes and experiences with them.
i have spent alot of time talking to folks about issues and some have said that newell has told them they cannot help them with their hwh problems.
i know that richard has spent even more time than i as well as glen and others.
top it off with the fact that hwh in iowa has a rather unusual phone support system that makes it challenging to get timely help. in addition, newell did some of their own modifications to the hwh setup so hwh is not always able to help.
i have done a handful of slide seals at my place on my own coach and others. i have a rather nice slide cart to take the flat floor slides out for replacing the seal. i am not always available but am usually willing to help with it if you are near az. the only cost is your blood sweat and tears and keeping me laughing.
all that said, please take the time to document whatever issues you have so that we can help each other as the support for our older systems slowly fades into the sunset.
lets keep helping each other. i am proud to be associated with all of you
tom
Black, Complete top kit, features new cable top fit, sunrider design. Complete Soft Top Kit with folding framework. The Soft Top is made of either a tough, vinyl-coated cotton/poly blend or the new premium acrylic fabric providing thicker four-ply, tight, quieter ride. Tops feature two quick-release header latches to raise and lower with minimal effort. Zip-out
windows, heavy duty seams and exclusive door frame system minimizes wind noise and water leaks. A Storage Bag for the soft windows, and a special Boot to stow the folded top is also available if desired.
Fits:
* Jeep:
* Wrangler,
* Wrangler JK
2018 Jeep Wrangler JK Rubicon, Sahara, Sport, Sport S
3.6L V6 - Gas
2017 Jeep Wrangler Rubicon, Sahara, Sport 3.6L V6 -
Gas
2016 Jeep Wrangler 75th Anniversary, Rubicon, Sahara,
Sport, Sport S 3.6L V6 - Gas
2015 Jeep Wrangler Rubicon, Sahara, Sport 3.6L V6 -
Gas
2014 Jeep Wrangler Rubicon, Sahara, Sport 3.6L V6 -
Gas
2013 Jeep Wrangler Rubicon, Sahara, Sport 3.6L V6 -
Gas
2012 Jeep Wrangler Rubicon, Sahara, Sport 3.6L V6 -
Gas
2011 Jeep Wrangler 70th Anniversary, Rubicon, Sahara,
Sport 3.8L V6 - Gas
2010 Jeep Wrangler Rubicon, Sahara, Sport 3.8L V6 -
Gas
2009 Jeep Wrangler Rubicon, Sahara, X 3.8L
V6 - Gas
2008 Jeep Wrangler Rubicon, Sahara, X 3.8L
V6 - Gas
2007 Jeep Wrangler Rubicon, Sahara, X 3.8L
V6 - Gas
location: Las Vegas, Nv - prefer local pickup
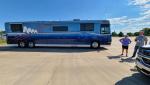
This is a serious yet fun question. This past week we took a ferry from Port Angeles WA to Victoria BC and another one from Vancuver Island to Vancuver BC. WITHOUT the Newell. But as I sat in my car I was wondering if I could do this with the Newell. The short answer for the Port Angeles/Victoria ferry is NO. Newells will easily fit but the breakover angle on the enter exit ramp is two much, you will high center a Newell. The Vancuver Is/Vancuver ferry is a maybe. It was a double decker and I didn't get to see the entrance/exit ramps on the bottom level where the semis and other large rigs park.
I did see several nice class A's, and C's along with several travel trailers and semis getting on and off.
My questions to you guys is: Have any of you taken your Newell on a ferry? Of so which one/s and were there any issues we should be aware of.
I’ve been starting my coach for the last few weeks and I noticed the Detroit 60 struggling few minutes after start up. It’s as if it fuel would slowly cut off, the engine start slow down at idle and eventually cut off. Now I can’t even get it to start. In doing some research, I understand it can be a multitude of things from the ECM to fuel
Pump or bad diesel. I was just wondering if anyone here had run into the same problem before calling out a mechanic? Thanks for any help?

See Post 21 for relocation Info due to Helene damage in Asheville. Rhonda and I plan to stay May 6 to May 18 2025 at the East Asheville KOA in Swannanoa NC. Please join us if you can. It is not a resort campground but Asheville has a lot to offer with the Blue Ridge parkway, arts scene, Biltmore House, Chimney Rock, and a vibrant food scene. We will be in site B18. They have about 20 truly big rig sites, so reserve now if you want a spot. I know it’s a year away, but I am married to the uberplanner.
05-31-2024, 04:38 PM
Forum: Coaches for Sale (Please read the info in the Category description)
- Replies (6)
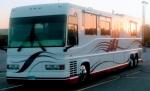
It's time to let our coach go.. we're just not getting enough usage out of it
Mileage 177 k. Detroit 60 series 1995 coach #395
Allison trans
All air bags and lines to replaced
fan hub replaced
6 tires replaced
new backup camera
Capt.chairs...sofa...dinette...releathered
Installed all new one touch shades
I'm sure I'm forgetting alot but have paperwork and receipts for all work done
Dependable coach 53k asking price
More pictures on request
We drive conn.to az and back every year for the winter...the wife says sell it
Any questions call 869.268.2017.
24 more pictures below in different post
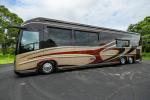
Gurus, My 2009 coach 1261 has 2 failed southco bay latches on the fuel door. One of the latches does not release with the safety pull cable. Does anyone have advice as to how to release this latch when the pull cable has no effect?
I had this happen to a latch in a pass through bay and was able to crawl in and remove the catch from the coach body by removing the two bolts. This is not possible in this case because the tank is in the way and batteries are in the bay on the other side of the coach. HELP!!
BTW, the latches failed at the same time when I lifted the release handle on the fuel door and the handle stayed out. I rushed to activate the bay door locks (which turn off the power) but it was too late. Both were dead. We had just left Newell after our PM, and were on the way to an appointment, so we couldn't go right back. We planned to go after we were free. Besides, I checked the release cable operation for both latches and they worked. Fast forward a few weeks and I had used the cables to release the fuel door several times. Today one of the release pull cables had no effect. Therefore no fuel could be added. Not enough fuel to guarantee making it to Newell.
I called Newell and the recommendation was 1. pull the release cable. 2. spray wd-40 into the southco latch. 3. try pulling the cable again while pushing in where the latch mates so the pressure is off the latch while pulling. No workee....
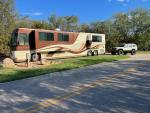
2 newells at the same fuel stop in Austin,tx.
we pulled up at the fuel station in Austin in our newell ( the one on the left tan and brown one) and next to us was another older newell. I cant remember there name but I think they were in coach # 570 but not sure. Very nice people. What are the odds of this and we were not traveling together either
I'm trying to get the panty big sliding drawer out. I do not see any levers and it's pretty difficult to get in there to probe around. What am I missing?