-
2027 Little Valley (No) R...
Forum: Get Togethers
Last Post: [email protected]
Yesterday, 01:48 PM
» Replies: 10
» Views: 573 -
Best approach for getting...
Forum: Newell History
Last Post: Jack Houpe
Yesterday, 03:04 AM
» Replies: 4
» Views: 107 -
New to Newell and DDECII
Forum: Engine and Transmission Monitoring Systems
Last Post: Norton1090
10-06-2026, 08:14 AM
» Replies: 4
» Views: 179 -
Air Brake Chambers
Forum: Air Operated Systems and Leaks
Last Post: Jack Houpe
10-06-2026, 07:20 AM
» Replies: 5
» Views: 188 -
Our first RV, coach 210
Forum: Please introduce yourself
Last Post: Jack Houpe
10-06-2026, 02:49 AM
» Replies: 5
» Views: 167 -
Power tech generator
Forum: Generators
Last Post: PMCBR
10-05-2026, 06:11 PM
» Replies: 2
» Views: 141 -
Reverse lights not workin...
Forum: Electrical
Last Post: Richard
10-05-2026, 02:24 PM
» Replies: 6
» Views: 292 -
Tag Axle Bushing Replacem...
Forum: Suspension/Tires/Wheels
Last Post: [email protected]
10-05-2026, 10:15 AM
» Replies: 3
» Views: 167 -
Front Aquahot hose leaks
Forum: Heating Systems
Last Post: [email protected]
10-05-2026, 10:14 AM
» Replies: 41
» Views: 5,933 -
New to me 2005 Newell 47 ...
Forum: Please introduce yourself
Last Post: superboop
10-05-2026, 08:16 AM
» Replies: 9
» Views: 445
- Forum posts:70,780
- Forum threads:8,450
- Members:4,465
- Latest member:[email protected]
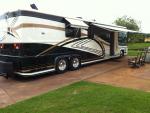
My coach has a 1 5/8" front sway bar that attaches on the bottom of the front of the A-arms. In the last two months I hit something, pot hole or??????, and it badly disfigured the left sway bar mount where it attaches to the left A-arm.
Newell uses sway bars & mounts manufactured by Roadmaster Inc. They don't sell directly, but their products are available on etrailer.com. These are the part numbers for the repair I purchased from etrailer.com.
The bracket part number is RM140
The bushing part number is RM205222-10


12-10-2020, 05:24 AM
Forum: Coaches for Sale (Please read the info in the Category description)
- Replies (9)
No affiliation, just passing on what seems like a good deal. Anyone know the unit #? history? just curious
https://orlando.craigslist.org/rvs/d/mas...48189.html

Gurus,
I have had a recurring problem with the ignition key and starting the coach. Sometimes...(not always)...I would turn the key and nothing would happen. Coach didn’t crank or start....nothing. After a few more tries, it would start as always.
When I was at Newell, they looked into the problem and said that sometimes wires will push out of the relay blocks located under the passenger kick panel. They fiddled with the wires and seemed to clear the problem. But after a few days it came back.
I finally found the culprit. There are several relays that work together to first “turn on” the dash and then to start the engine. Visual inspection followed by wiggling each of the relays identified the culprit relay. On the guilty relay, a wire had gotten hot and was slightly pushed out of the relay block. What was happening is that the spade on the relay was just touching a large gauge push on connector within the block. Heat had obviously built up and was causing problems.
The fix is to remove the connector from within the block. (Use a sharp probe from the relay side of the block to release the connector). Replace the connector and reinsert into the block.
So far it is working.
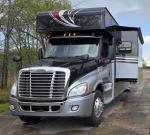
hi, i am working on tonys 2003. it has the bode air door
he has not had the outside keypad work for some time.
it is a essex ke1602. i have the manual for it from my coach. i reprogrammed it to his desired master code an entry codes.
but.....the relay is not claking like mine does and the door does not lock. the keypad is operating correctly i believe so it is the control panel and or the relay
the relay powers a solenoid of some type that makes a noise directly behind the keypad on mine. he said it used to work and make that noise but no longer.
he seems to think there is something in the rear bedroom closet that is for it.
the control box is not where it is in mine. is it behind the master lighting panel that is on your left as you enter?
any wisdom here?
tom
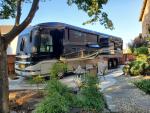
I have spoken to a "lets say dealer" who told me some people buy these coaches just to drive them for six months and then try to resale them at a higher price???? Ok Ive never heard that one before! Sounds like a line of BS. I call BS
Gurus,
Have you ever seen a recommendation to install wheel lug nuts with a torque wrench? (Of course!)
Have you ever seen a recommendation to re-torque the wheel lugs after driving 5-50 miles? Well, to be honest, I have seen the second recommendation but have never followed it. It seemed to me that it was more like an ideal case and wasn’t needed in the real world.
I WAS WRONG!
Today I was working with a friend to replace the caliper on my tag axle. To access the brakes we needed to remove the wheel. We used a 1” impact wrench to remove the lug nuts but did not measure the existing toques.
Once we got the caliper swapped. We put the wheel back on and tightened the lug nuts back on with a 48” torque wrench. The process that we followed was:
- Mount the wheel onto the coach.
- Put the lugs nuts onto the studs and lightly tighten them using an impact wrench.
- Lower the wheel so that it just touched the ground (no weight on the wheel).
- Tighten the lug nuts using the torque wrench using the Alcoa recommended star pattern to 475 ft-lbs.
- Re-tighten each lug nut to 475 ft-lbs using a circular pattern.
In the past I have had service work done that involved removing the wheels. The service shop used big impact wrenches to re-install the lug nuts, and then pulled out a torque wrench to verify that the wheel was torqued enough. This process is flawed in that it only ensures that the lug is tight....it does not identify or prevent an over-tightened lug.
I noticed recently that Newell had checked the torque on my lug nuts during annual service. I believe this is a great thing to look at before setting out on a long journey.
So...what is the point? I humbly submit the following recommendations.
- Get yourself a 4’ (48”) torque wrench and carry it with you. The one we used is rated to around 700 ft lbs. It has a 3/4” drive. The lug nut socket was 33mm. It was not difficult to achieve the 475 ft-lbs we were looking for.
- Whenever anyone removes a wheel, be sure to follow up by re-torquing the lug nuts after a 5-50 mile drive.
- Never allow anyone to use an impact wrench to tighten down the lug nuts. It’s fine to spin on the lug nuts but the final tighten should be done with a torque wrench.
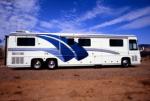
Andrew Steele gets a test drive in #1712.
https://youtu.be/1N35jQFTOhQ
Long but Josh Snider goes over a lot of the new features of a Newell.
12-08-2020, 03:46 AM
Forum: Coaches for Sale (Please read the info in the Category description)
- Replies (1)
Quad slide, bath and a half, front entry, heated porcelain matte finish tile flooring throughout. American Oak laminate cabinetry.
https://www.newellcoach.com/default.asp?...dInventory
I posted this a few weeks ago in the general repairs area and didn't get a response so I thought I'd try one more time, in plumbing.
I have a 20 gal. Raritan water heater and I am wondering if anyone out there has ever used a Bi-pass kit when winterizing. If, is there an off the shelf version or did you make it? Pics would be helpful.I
Thanks

I've discovered that my ISRI seat needs to have the air lines replumbed. Someone had kinked off the supply line because they were unable to solve an air leak problem in the seat and although the majority of the controls, up, down, forward, backward, back tilt are electric it would be nice to have the air controlled portion of the seat, lumbar and flank support functional. I've attempted to contact ISRI to obtain repair parts or diagrams but was told due to the age of the seat they no longer support it.
Does anyone have a diagram of the ISRI seat air supply for seats around the 2007 vintage?
Thanks