-
Best approach for getting...
Forum: Newell History
Last Post: Jack Houpe
4 hours ago
» Replies: 4
» Views: 56 -
New to Newell and DDECII
Forum: Engine and Transmission Monitoring Systems
Last Post: Norton1090
10-06-2026, 08:14 AM
» Replies: 4
» Views: 138 -
Air Brake Chambers
Forum: Air Operated Systems and Leaks
Last Post: Jack Houpe
10-06-2026, 07:20 AM
» Replies: 5
» Views: 145 -
Our first RV, coach 210
Forum: Please introduce yourself
Last Post: Jack Houpe
10-06-2026, 02:49 AM
» Replies: 5
» Views: 127 -
Power tech generator
Forum: Generators
Last Post: PMCBR
10-05-2026, 06:11 PM
» Replies: 2
» Views: 118 -
Reverse lights not workin...
Forum: Electrical
Last Post: Richard
10-05-2026, 02:24 PM
» Replies: 6
» Views: 266 -
Tag Axle Bushing Replacem...
Forum: Suspension/Tires/Wheels
Last Post: [email protected]
10-05-2026, 10:15 AM
» Replies: 3
» Views: 135 -
Front Aquahot hose leaks
Forum: Heating Systems
Last Post: [email protected]
10-05-2026, 10:14 AM
» Replies: 41
» Views: 5,879 -
New to me 2005 Newell 47 ...
Forum: Please introduce yourself
Last Post: superboop
10-05-2026, 08:16 AM
» Replies: 9
» Views: 421 -
Driver steer blow out.
Forum: Slides
Last Post: Jesse
09-30-2026, 01:03 PM
» Replies: 15
» Views: 744
- Forum posts:70,778
- Forum threads:8,450
- Members:4,461
- Latest member:CBpgh81

Hey guys so we are getting our 1980 coach ready for our trip to the smokies Monday and I noticed no brake lights so I checked fuses some seemed nasty and old so I swapped them, no lights, I then checked the hazards switch, all works, now I’m looking for the brake switch and there is nothing that looks like a brake switch near the brake pedal, i then take the brake lights out, 0 volts when no brake applied, 0 volts when brake is applied, headlights turn on and marker lights on 6 volts, brake apply with all lights on 6 volts. What am I missing please help before we have to cancel our trip. Any advice where the brake switch.

11-18-2021, 03:19 PM
Forum: Coaches for Sale (Please read the info in the Category description)
- Replies (7)
With regret, I am selling my 1988 Newell #174. 125k miles. 8v92 all original and well maintained. Recently serviced at ABC Bus in Winter Garden Fl. Ready for the road, will forward pictures as soon as I figure out how.
Asking $39,900.

11-18-2021, 02:50 PM
Forum: Newell Coach Original Blueprints or Plans
- Replies (3)
Link below to PDF floor plan
https://drive.google.com/file/d/1DZ4IPLC...sp=sharing
Been here for 2 weeks and accomplished so many repairs to the coach.
If he ever extends the invitation to visit you really need to accept. You'll learn so much about Newell Coaches and gain a friend or two.
Thanks Tom and Darlene.
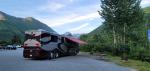
So far so good! Temps are in the single digits and dropping into the negitives at night. Couple of take aways so far is to ensure the front 110v compressor bay is heated and covered or it freezes solid . The water bay built in electric heaters are no way close to keeping the bay above freezing, requiring an extra electric heater down low. The rear slide below the head of the bed where the water lines enter the coach from below will freeze, requiring another electric heater under the head of the bed. So much ice has built on the sides of the slides that the coach will be stationary until breakup in spring. So I went and purchased a class B - 4 season coach by Xplorer a 228 model to get my RV and camping fix in this winter while in Alaska!
Jesse Coach 582 2001
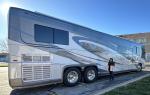
I installed new LED puck lights in my coach which fit amazingly perfect. I would like to be able to dim them however, the way Newell had wired these up, I only have two wires at each switch. I assume they break the positive line and ground the puck lights elsewhere. This would require me to run a separate additional ground wire to the lights from the dimmers I have seen on Amazon. Has anyone done this a different way?
Tried to leave this afternoon and the front passenger airbag is refusing to do anything. I generally turn on the key (had the engine running) and on the HWH panel clicked the upper button to put the coach into leveling mode so I can raise the coach all the way up. Then I normally let the coach go into travel mode. This time when I tried to raise the coach all the way up the front passenger airbag refused to budge. I tried different things with the HWH panel to no avail. Any help is appreciated! Not sure how to test the airbag for leaks - I don’t hear air escaping and the coach is really low to the ground.
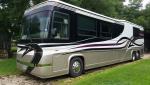
Sitting here in Michigan thinking I should head back to Texas soon. There is something wrong with this picture!
Any driven nuts by the beep when using the turn signals?
I’m going to be replacing the old Freedom soon since the remote panel works sporadically and says my engine batteries are almost dead when I know they are not (tested them to be sure). If I were going to ‘one day’ convert to Lithium batteries and solar panels should I go with something like a Victron system?
I am planning to use my existing AGMs and program the inverter for them - would this be a good idea or am I missing something?
What should I use to charge my coach/engine batteries?
This is a system I’m considering (among other options):
Victron Energy MultiPlus-II 12/3000/125-50 @X120V
Victron VE.Bus Smart Dongle
Victron Cerbo GX
Victron BMV-712 Battery Monitor (OR Victron Energy GX Touch 50)
Victron Interface MK3-USB (VE bus to USB)
Any help or comments is highly appreciated!
I don’t want to have to throw out anything later because I missed something!